Complete DIY Electrical Installation Guide with Safety Tips, NEC Best Practices, Outlet Wiring Instructions, and Circuit Breaker Installation Steps
Electrical upgrades are one of the most important improvements you can make to your home. Whether you are adding a new appliance, finishing a basement, upgrading an old room, or expanding your electrical capacity, learning how to install a new circuit breaker and outlet can help improve safety, efficiency, and convenience.
However, electrical work is not something to take lightly. Improper installation can lead to overloaded circuits, electrical fires, damaged appliances, or serious injury. That is why it is essential to follow proper safety standards, use the correct tools, and understand the National Electrical Code (NEC) requirements before starting.
In this comprehensive guide, we will walk you through everything you need to know about installing a new circuit breaker and electrical outlet safely and correctly. You will learn about choosing the right breaker, understanding outlet types, gathering tools, wiring properly, and avoiding common electrical mistakes.
Why You Might Need a New Circuit Breaker and Outlet
Many homeowners eventually need to install a new breaker and outlet for additional electrical capacity. Modern homes use significantly more power than older electrical systems were designed to handle.
You may need a new circuit breaker and outlet if you are:
- Installing a new refrigerator, microwave, or HVAC system
- Setting up a home office or entertainment system
- Finishing a garage, basement, or workshop
- Adding outdoor outlets
- Replacing outdated two-prong outlets
- Experiencing frequent breaker trips
- Expanding kitchen or bathroom electrical access
- Installing dedicated appliance circuits
Adding a properly sized breaker and outlet helps distribute electrical loads safely while reducing the risk of overheating or overloaded wiring.
Understanding Circuit Breakers and Electrical Outlets
Before beginning the installation process, it is important to understand how these components work together.
What Is a Circuit Breaker?
A circuit breaker is a safety device installed inside your electrical panel that automatically shuts off power when a circuit becomes overloaded or short-circuited. This prevents electrical fires and protects your home’s wiring system.
Modern circuit breakers are designed to detect unsafe electrical conditions instantly. If too many devices draw power from one circuit, the breaker trips and disconnects the electrical flow.
Single-Pole Circuit Breakers
Single-pole breakers are commonly used for standard 120-volt household circuits such as bedrooms, living rooms, and general-purpose outlets.
Double-Pole Circuit Breakers
Double-pole breakers are used for 240-volt appliances including dryers, ovens, water heaters, and HVAC systems.
GFCI Breakers
Ground Fault Circuit Interrupter (GFCI) breakers provide extra protection against electric shock in wet areas like kitchens, bathrooms, garages, and outdoor spaces.
AFCI Breakers
Arc Fault Circuit Interrupter (AFCI) breakers help prevent electrical fires caused by damaged wiring or arcing.
Types of Electrical Outlets
| Outlet Type | Primary Use | Common Location |
|---|---|---|
| 15-Amp Outlet | General household use | Bedrooms, living rooms |
| 20-Amp Outlet | Higher-powered appliances | Kitchens, garages |
| GFCI Outlet | Moisture protection | Bathrooms, outdoors |
| USB Outlet | Charging devices | Offices, bedrooms |
Important Safety Precautions Before Starting
Before installing a new circuit breaker and outlet:
- Turn off the main power supply
- Verify power is disconnected using a voltage tester
- Wear insulated gloves and safety glasses
- Never work on live wiring
- Follow local electrical codes
- Use properly rated wires and breakers
- Avoid overloading circuits
- Consult a licensed electrician if unsure
If your electrical panel is outdated, damaged, or lacks capacity, contact a professional electrician before attempting any upgrades.
Tools and Materials You Will Need
Essential Electrical Tools
- Screwdrivers – Both Phillips and flathead screwdrivers
- Voltage Tester – To confirm power is disconnected
- Wire Strippers – For safely removing insulation
- Needle-Nose Pliers – For wire manipulation
- Electrical Tape – For insulating exposed wires
- Drill and Drywall Saw – For cutting outlet openings
Materials Required
- New circuit breaker
- Electrical outlet
- Electrical cable
- Outlet box
- Wire nuts
- Cable clamps
- Outlet cover plate
- Mounting screws
Always ensure that all materials are UL-listed and compatible with your electrical system.
Step-by-Step Guide to Installing a New Circuit Breaker and Outlet
Step 1: Turn Off the Main Power
Before touching your electrical panel, shut off the main breaker supplying electricity to the home.
Use a voltage tester to confirm there is no power flowing through the panel or wires.
This is the most important safety step in the entire process.
Step 2: Plan the Outlet Location
Choose a convenient and code-compliant location for the new outlet.
Avoid installing outlets near:
- Water sources
- Excessive heat
- Sharp corners
- Areas with poor ventilation
Step 3: Determine Circuit Load Requirements
Calculate the total electrical load that will use the new outlet.
Standard residential applications typically use 14-gauge wire for 15-amp circuits and 12-gauge wire for 20-amp circuits.
Never install undersized wiring because it can overheat and become a fire hazard.
Step 4: Install the Electrical Box
Cut an opening in the drywall using a drywall saw.
Insert the outlet box into the wall and secure it firmly using mounting brackets or screws.
Step 5: Run the Electrical Cable
Route the electrical cable from the breaker panel to the new outlet location.
Secure the cable using approved staples or cable clamps.
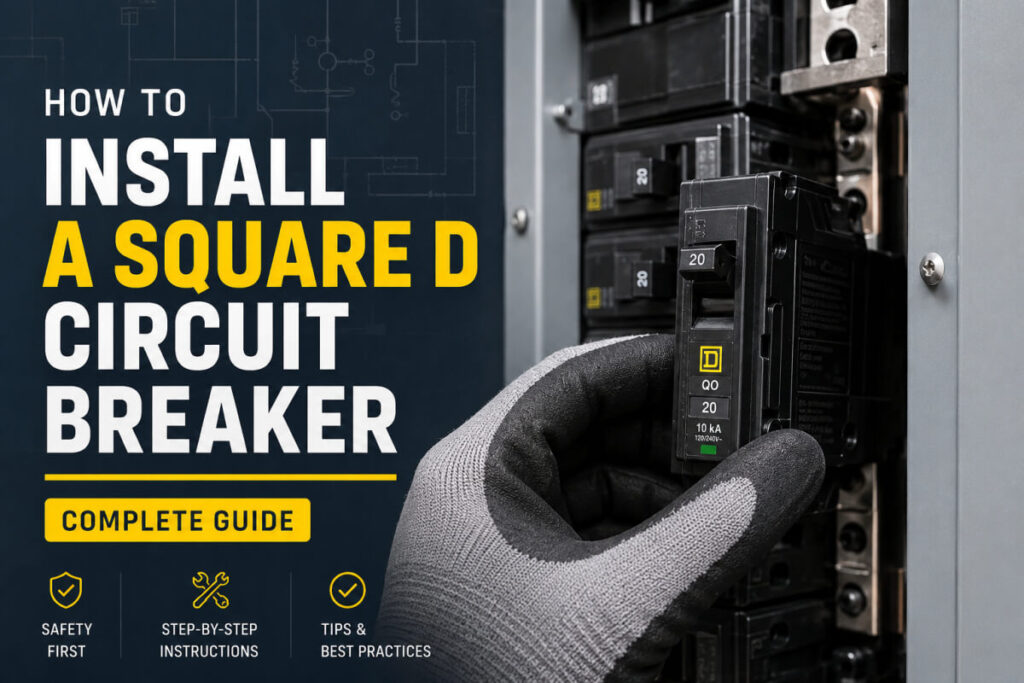
Step 6: Install the New Circuit Breaker
Remove the electrical panel cover carefully and locate an available slot for the new breaker.
- Match the breaker brand with your panel manufacturer
- Use the correct amperage rating
- Never force a breaker into place
Step 7: Connect the Wiring Inside the Panel
Connect the hot wire to the circuit breaker terminal.
Attach the neutral wire to the neutral bus bar and connect the ground wire to the grounding bar.
Tighten all terminal screws securely.
Step 8: Wire the Electrical Outlet
At the outlet location:
- Connect the black hot wire to the brass terminal
- Connect the white neutral wire to the silver terminal
- Connect the ground wire to the green grounding screw
Carefully fold the wires into the electrical box and secure the outlet using mounting screws.
Step 9: Restore Power and Test the Circuit
Turn the main breaker back on and switch on the newly installed breaker.
Use an outlet tester or voltage tester to confirm the outlet works correctly.
Check for:
- Proper voltage
- Secure connections
- No sparking or unusual heat
- Correct grounding
Common Mistakes to Avoid During Installation
Using the Wrong Breaker Size
Installing a breaker with too high an amperage rating can allow wires to overheat dangerously.
Mixing Wire Gauges
Always match wire gauge to breaker size for safe electrical performance.
Loose Connections
Loose terminal connections create resistance and dangerous heat buildup.
Ignoring Electrical Codes
Local permits and inspections may be required depending on your location.
When to Hire a Licensed Electrician
While some homeowners are comfortable handling basic electrical work, certain situations require professional expertise.
You should hire a licensed electrician if:
- Your panel is outdated
- You need a panel upgrade
- Aluminum wiring is present
- You are unsure about code compliance
- The installation involves 240-volt circuits
- Your home has frequent electrical issues
Benefits of Installing a Dedicated Circuit
| Benefit | Why It Matters |
|---|---|
| Improved Safety | Reduces overload risks and breaker trips |
| Better Appliance Performance | Provides consistent electrical flow |
| Increased Home Value | Updated electrical systems appeal to buyers |
| Future Expansion | Makes renovations and upgrades easier |
Understanding Electrical Code Requirements
The National Electrical Code (NEC) establishes minimum safety standards for residential electrical systems.
Common NEC requirements include:
- GFCI protection in wet locations
- AFCI protection in living spaces
- Proper grounding
- Correct wire sizing
- Tamper-resistant outlets
- Dedicated appliance circuits
Frequently Asked Questions
Can I Install a Circuit Breaker Myself?
In many areas, homeowners can perform basic electrical work. However, local permits and inspections may still be required. If you lack experience, hiring a licensed electrician is safer.
How Much Does It Cost to Install a New Circuit Breaker and Outlet?
Costs vary depending on labor, materials, panel accessibility, and circuit complexity. DIY installations may cost between $50 and $200 in materials, while professional installations can range from $200 to $800 or more.
What Size Breaker Do I Need?
The breaker size depends on the electrical load and wire gauge. Standard household circuits typically use 15-amp or 20-amp breakers.
Do New Outlets Need GFCI Protection?
Yes, outlets installed in kitchens, bathrooms, garages, basements, laundry rooms, and outdoor areas usually require GFCI protection.
Need Professional Electrical Assistance?
Ensure your circuit breaker and outlet installation is completed safely and professionally with expert electrical support.
Contact Our Team Browse Circuit BreakersFinal Thoughts
Learning how to install a new circuit breaker and outlet can help homeowners safely expand their electrical systems and support modern energy demands. With proper planning, correct materials, and careful attention to safety, installing a new breaker and outlet can improve convenience, electrical performance, and overall home safety.
However, electrical work always carries risks. If you feel uncertain at any stage of the process, contact a licensed electrician to ensure your installation meets all safety standards and local code requirements.
A properly installed circuit breaker and outlet not only protect your appliances and wiring but also give you peace of mind knowing your home’s electrical system is operating safely and efficiently.