Step-by-Step Trane AC Contactor Replacement — Finding the Right Part, Safe Disconnection, Wiring, and Testing
Replacing the contactor on a Trane AC unit is one of the more cost-effective repairs a homeowner can complete without a service call — the part itself costs $15 to $40, the tools required are basic, and the replacement process takes 30 to 60 minutes for someone working carefully for the first time. The contactor is a high-voltage switching component, so the safety steps matter — but the replacement itself involves disconnecting a handful of wires, swapping the component, and reconnecting in the same configuration.
This guide covers how to identify a failing Trane contactor, how to find and order the correct replacement, and how to complete the replacement safely from initial power-off through final testing.
Signs the Contactor on Your Trane AC Unit Needs Replacing
The contactor is the component most likely to cause a Trane condenser that hums but won’t start, a unit that runs continuously, or a unit that works intermittently. Identifying the symptom pattern before disassembly confirms the contactor is the correct component to replace.
🔇 Condenser Hums But Compressor Doesn’t Start
The contactor coil is energized but contacts aren’t closing. Power isn’t reaching the compressor or fan. The most common Trane contactor failure mode — heavily pitted contacts that no longer conduct reliably.
🔁 AC Short-Cycles or Starts and Immediately Stops
Contacts close briefly then arc open. The compressor attempts to start but the circuit opens before it reaches operating speed. Intermittent contact failure from arc-eroded surfaces.
🌡️ AC Won’t Shut Off
Welded contacts — the contact surfaces have fused under arc heat. The compressor runs continuously regardless of thermostat position. Disconnect power at the condenser disconnect box immediately if this is the symptom.
⚡ Chattering or Buzzing from Condenser Cabinet
Rapid make-and-break at the contactor — degraded contacts or low coil voltage. Audible chattering from the Trane condenser when the thermostat is calling for cooling is a specific contactor symptom distinct from capacitor or compressor noise.
🔥 Burned or Pitted Contact Surfaces
Visible on inspection — blackening, cratering, or welding on the contact faces when the contactor is removed. Even if the unit appears to work, severely pitted contacts are at end of life and will fail completely soon.
📅 Age — 7+ Years of Service
A residential AC contactor typically has a service life of 5–10 years. On a Trane unit that is 7 or more years old with original components and no prior contactor service, proactive replacement during seasonal maintenance prevents an emergency during peak cooling season.
Finding the Right Replacement Contactor for Your Trane Unit
Trane residential condensers use 2-pole contactors with a 24V AC coil in the vast majority of installations — but the amperage rating varies by system size. Using an undersized contactor accelerates contact wear; using the wrong pole count creates a circuit fault. There are three ways to confirm the correct replacement spec.
Method 1: Match the Original Contactor Label
The existing contactor has its specifications printed on a label on the side of the housing: pole count (1P or 2P), coil voltage (24V AC), and amperage rating (typically 30A or 40A for residential). The part number printed on the label — a Trane part number or OEM equivalent like HN51KC024 or similar — can be used to order a direct replacement. This is the most reliable method.
Method 2: Check the Condenser Data Plate
The data plate inside the condenser cabinet lists the MCA (Minimum Circuit Ampacity) and MOCP (Maximum Overcurrent Protection) for the unit. The contactor amperage should equal or exceed the MCA. A Trane XR15 3-ton unit with a 20A MCA uses a 30A contactor; a 4-ton unit with a 25A MCA also typically uses a 30A or 40A contactor depending on the model year.
Method 3: Trane Model Number Lookup
The Trane model number on the data plate can be cross-referenced against Trane’s parts catalog or a supplier database to identify the OEM contactor specification. Generic equivalent contactors from Packard, Mars, or similar brands — matched on pole count, coil voltage, and amperage — are widely accepted replacements and typically cost significantly less than OEM Trane parts.
| Trane System Size | Typical MCA | Contactor Rating | Coil Voltage | Poles |
|---|---|---|---|---|
| 1.5 – 2 ton | 12–15A | 30A | 24V AC | 2-pole |
| 2.5 – 3 ton | 15–20A | 30A | 24V AC | 2-pole |
| 3.5 – 4 ton | 20–26A | 40A | 24V AC | 2-pole |
| 4.5 – 5 ton | 26–35A | 40A | 24V AC | 2-pole |
Tools and Materials Needed
What You’ll Need Before Starting:
- Replacement contactor (matched spec — correct pole count, coil voltage, amperage)
- Phillips and flathead screwdrivers
- ¼ inch nut driver or socket
- Non-contact voltage tester
- Multimeter (for diagnostic confirmation and post-replacement testing)
- Insulated needle-nose pliers
- Phone or camera (to photograph existing wiring before disconnecting)
- Electrical tape or wire markers (for labeling wires if needed)
How to Replace the Contactor on a Trane AC Unit: Step-by-Step
-
Turn off the thermostat and disconnect power at the condenser disconnect box. Set the thermostat to OFF. Locate the condenser disconnect box mounted on the exterior wall near the unit — pull the disconnect block out or turn the disconnect switch to the OFF position. This cuts 240V power to the condenser. Do not proceed until you have physically removed or switched the disconnect.
-
Trip the circuit breaker at the main panel. As a second layer of protection, find the breaker serving the AC condenser in the main panel and switch it OFF. With both the disconnect and the breaker open, the condenser is fully de-energized. Confirming power is off at the panel before working on any 240V HVAC component is non-negotiable — the disconnect alone is sufficient for code, but the panel breaker adds a second barrier.
-
Wait 5 minutes, then verify power is off with a non-contact voltage tester. The run capacitor inside the condenser stores charge even after power is disconnected. Wait at least 5 minutes before opening the cabinet, then use your non-contact voltage tester inside the cabinet before touching any terminals. Confirm no voltage is present at the contactor line terminals before proceeding.
-
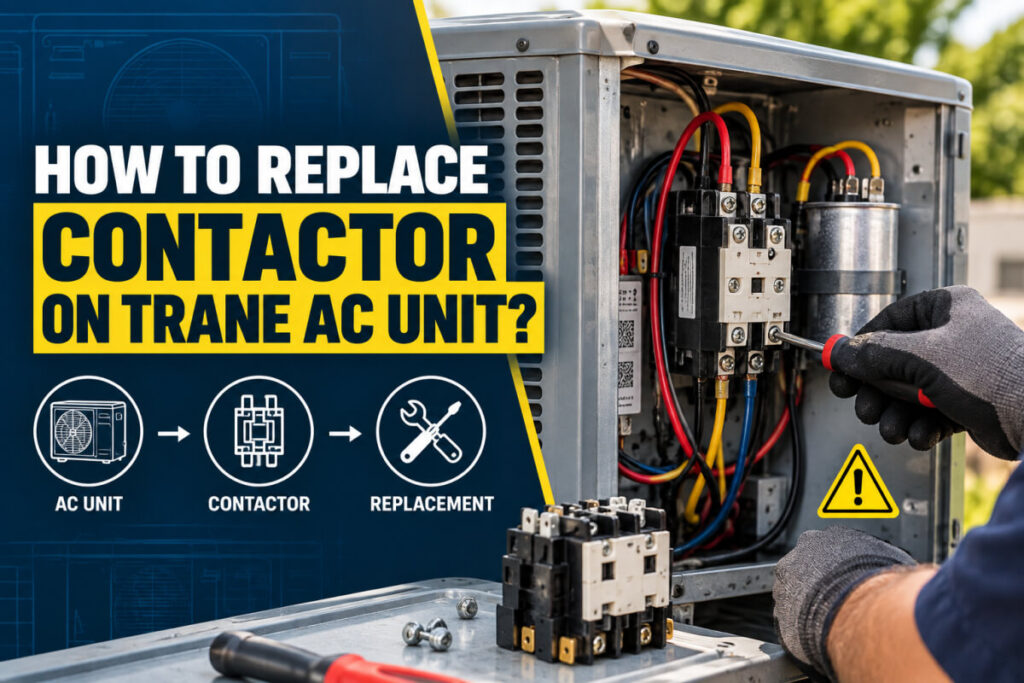
Remove the condenser cabinet access panel. Remove the screws securing the access panel on the side of the condenser unit. Set the panel aside. Locate the contactor — it is typically mounted on the side wall of the condenser interior, a rectangular relay-like component with multiple wire terminals. Identifying the contactor inside the condenser is straightforward once you know what to look for — it’s the device with both large-gauge high-voltage wires and small-gauge 24V control wires attached.
-
Photograph all wire connections before disconnecting anything. Take a clear photo of the existing contactor from two angles — showing all wire terminals and which wire connects where. This photo is your reconnection reference and eliminates any ambiguity about terminal assignment when installing the new contactor.
-
Label and disconnect the wires one at a time. Starting with the low-voltage control wires at the coil terminals (A1 and A2), disconnect each wire and note where it came from. Then disconnect the high-voltage line-side wires (L1 and L2) and the load-side wires (T1 and T2). Use electrical tape and a marker to label each wire if the photo reference isn’t clear enough. Understanding what A1 and A2 on an AC contactor mean prevents the coil wires from being swapped with the high-voltage terminals.
-
Remove the old contactor from its mounting bracket. The contactor is held to the condenser wall with two screws — typically ¼-inch. Remove the screws and pull the contactor free. Set it aside.
-
Mount the new contactor in the same position. Place the new contactor in the same mounting location and secure with the two mounting screws. Confirm the contactor is oriented so the terminal labels (L1, L2, T1, T2, A1, A2) are visible and accessible.
-
Reconnect all wires in the exact same configuration. Using your photo as reference, reconnect each wire to the corresponding terminal on the new contactor. L1 and L2 are the 240V line-side (power supply) terminals; T1 and T2 are the load-side (to compressor and fan) terminals; A1 and A2 are the 24V coil control terminals. Tighten all terminal screws firmly — loose connections at 240V terminals are a primary source of contactor failure and arc damage.
-
Restore power and test the replacement. Replace the access panel, restore the condenser disconnect, and switch the panel breaker back ON. Set the thermostat to COOL mode with the setpoint below room temperature. Within seconds, you should hear the contactor click as the 24V signal from the thermostat energizes the coil. The compressor and fan should start. Allow the system to run for 5 minutes and confirm normal operation — airflow from the condenser fan, the compressor running smoothly, and the house beginning to cool.
AC Contactor Replacement Cost: DIY vs. Professional
💰 DIY Replacement
Part cost: $15–$40 for a compatible 2-pole 24V contactor. Total cost with tools (if not already owned): $30–$70. Time: 30–60 minutes. This is one of the most straightforward HVAC component replacements available to a careful homeowner.
🔧 Professional Replacement
Service call + labor: $75–$150. Part (at HVAC markup): $30–$80. Total: $100–$250 depending on market and contractor. For a full AC contactor replacement cost breakdown, professional rates vary significantly by region and whether the diagnosis is included.
Frequently Asked Questions
How Do I Know If My Trane AC Contactor Is Bad?
The most common signs are: the condenser hums but the compressor won’t start, the AC won’t shut off even when the thermostat is satisfied, or you hear chattering from the condenser cabinet when the system is calling for cooling. Visually inspecting the contact surfaces after removing the contactor — looking for blackening, pitting, or welding — confirms the diagnosis. Testing the AC contactor with a multimeter provides an electrical confirmation before ordering parts.
What Contactor Does a Trane AC Unit Use?
Most residential Trane condensers use a 2-pole, 24V AC coil contactor rated at 30A or 40A depending on the unit size. The specific part number is on the existing contactor label or can be determined from the unit’s model number. Common Trane OEM equivalents include the HN51KC024 and HN51KB024. Generic 24V 30A or 40A 2-pole contactors from brands like Packard are direct-replacement compatible.
Can I Replace the Contactor on My Trane AC Myself?
Yes — provided the power is properly disconnected at both the condenser disconnect and the main panel breaker, and you follow a photo-documented wire-by-wire approach. The contactor replacement itself involves no refrigerant work (no EPA certification required) and no structural electrical changes. It is a component swap that a careful homeowner with basic hand tools can complete.
How Long Does an AC Contactor Last on a Trane Unit?
Typically 5–10 years under normal residential use. Service life depends on how many switching cycles the system accumulates — systems that run frequently in hot climates will wear contactors faster. Pitted but functioning contacts are a sign the contactor is nearing end of life even if it hasn’t failed completely. Replacement during preventive maintenance avoids an emergency failure during peak summer demand.
What Happens If I Don’t Replace a Bad Contactor on My Trane AC?
A contactor that won’t close means no cooling and repeated failed compressor start attempts that stress the start capacitor and motor windings. A contactor stuck in the closed position means the compressor runs continuously without load — flooding the compressor with liquid refrigerant and causing valve damage within hours. A contactor not pulling in should be addressed the same day it’s diagnosed — the delay cost in compressor damage is far greater than the contactor replacement cost.
Need a Reliable Replacement Contactor?
Dvolt manufactures contactors and switching components built to consistent tolerances for residential and commercial HVAC applications — the right spec, reliably, every time.
Contact Our Team Browse Our ProductsFinal Thoughts
Replacing the contactor on a Trane AC unit is a practical, cost-effective repair that most homeowners can complete in under an hour. The key steps are confirming the correct replacement spec from the existing contactor label or the unit data plate, disconnecting power at both the condenser disconnect and the panel breaker, photographing the wiring before touching anything, and reconnecting wire for wire in the same configuration. Get the spec right, get the power properly off, and the replacement itself is straightforward — a $25 part swap that restores a system that would otherwise require a service call.